How to Clean Ceramic Tile: 5 Methods for Floors, Walls & Grout
Key Takeaways
-
Five cleaning methods cover every situation - from a quick daily mop to a full restoration clean for neglected tile.
-
Grout is the weakest point on any ceramic tile surface. Cleaning it separately with a peroxide-based paste prevents discoloration and bacteria buildup.
-
Room matters. Kitchen tile needs degreasing, bathroom tile needs soap scum and mold treatment, and entryways need grit removal first.
-
Wrong products cause permanent damage. Steel wool, ammonia on grout, and acidic cleaners left too long will etch, discolor, or weaken ceramic tile and grout.
-
A 10-minute daily routine eliminates 80% of deep cleaning needs and keeps ceramic tile looking new for years.
Introduction
Most people grab a mop, splash some cleaner on ceramic tile, and call it done. That approach leaves behind streaks, pushes grit into grout lines, and slowly dulls the tile surface over time.
Ceramic tile responds best to a layered cleaning strategy - matching the right method to the level of soil. A quick daily wipe handles surface dust. A targeted grout scrub tackles discoloration. A full restoration clean brings back tile that hasn't been properly maintained in years.
This guide breaks down five proven cleaning methods that work on ceramic tile floors, walls, showers, and backsplash. It also covers the specific stains, mistakes, and maintenance habits that separate a clean-looking tile surface from one that's genuinely clean.
What Makes Ceramic Tile Different from Other Tile Types?
Ceramic tile is made from natural clay fired at high temperatures, and its cleaning requirements depend almost entirely on whether the surface is glazed or unglazed.
Glazed vs. Unglazed Ceramic - Why It Changes Your Cleaning Approach
Glazed ceramic tile has a glass-like coating baked onto the surface during manufacturing. This glaze creates a barrier that resists water, stains, and most household chemicals. Cleaning glazed ceramic is straightforward - it tolerates a wide range of cleaners without damage.
Unglazed ceramic tile has no protective coating. It absorbs water, stains, and cleaning solutions directly into the clay body. Flooding an unglazed tile floor with water or using oil-based products can cause permanent discoloration and even structural damage over time.
Quick identification tip: Drop a small amount of water on the tile surface. If it beads up, the tile is glazed. If it absorbs within seconds, it's unglazed and requires gentler, drier cleaning methods.

How Ceramic Differs from Porcelain, Natural Stone, and LVP
Ceramic and porcelain look similar but behave differently. Porcelain is fired at higher temperatures with finer clay, making it denser and less porous. A cleaning method safe for ceramic may be too aggressive for natural stone and too gentle for heavily soiled porcelain.
Natural stone tiles like marble, travertine, and slate are highly sensitive to acidic cleaners. Even diluted vinegar - perfectly fine on glazed ceramic - can etch and permanently dull a marble surface. LVP (luxury vinyl plank) can warp under excessive moisture that ceramic handles without issue.
Knowing your tile type before choosing a cleaning method prevents expensive mistakes. If you're working with porcelain tile, the approach shifts in important ways.
Why Grout Is the Weak Link in Every Ceramic Tile Installation
Grout fills the joints between tiles, and it's made from a cement-based mixture that is inherently porous. Even sealed grout absorbs moisture, dirt, and bacteria over time.
This is why ceramic tile can look clean while the grout lines look filthy. The tile surface sheds soil easily. The grout traps it. Any effective ceramic tile cleaning plan must address grout as a separate task, not an afterthought.
Neglected grout doesn't just look bad. It harbors mold, mildew, and allergens that affect indoor air quality - particularly in bathrooms with poor ventilation.
Tools and Supplies You Need Before You Start
Grabbing random products from under the sink leads to wasted effort, streaky results, or damaged surfaces. Assembling the right kit before you start makes every cleaning method faster and more effective.
Essential Cleaning Tools (What Pros Always Have on Hand)
-
Microfiber flat mop - picks up dust and grit without scratching. Standard string mops push dirt around and leave too much water behind.
-
Soft-bristle scrub brush - for tile surfaces. Stiff nylon bristles work for grout.
-
Dedicated grout brush - narrow head gets into grout lines where flat mops and wide brushes miss entirely.
-
Two buckets - one for clean solution, one for rinse water. Single-bucket mopping recirculates dirty water.
-
Spray bottle - for targeted application on walls, backsplash, and small stain areas.
-
Squeegee - critical for wall tile and shower tile to prevent water spots and mineral deposits.
-
Microfiber drying cloths - buffing dry after cleaning eliminates streaks on glazed surfaces.
Best Cleaning Solutions for Ceramic Tile (DIY and Store-Bought)
For daily cleaning: Warm water with 2-3 drops of pH-neutral dish soap. Nothing more. Heavy detergent leaves residue that attracts dirt faster.
For weekly cleaning: A diluted vinegar solution (1 part white vinegar to 10 parts warm water) works on glazed ceramic tile surfaces. Avoid using vinegar on grout - the acidity degrades cement-based grout over time.
For deep cleaning and grout: Oxygen-based cleaners or hydrogen peroxide-based products cut through embedded soil without the harshness of bleach. Professional-grade tile-safe cleaning chemicals provide stronger results for heavy buildup situations.
For restoration-level cleaning: Alkaline pre-sprays followed by an acidic rinse deliver the best results on ceramic tile that hasn't been properly cleaned in years. This two-step pH approach is what professionals use on commercial jobs.

What NOT to Use on Ceramic Tile
Steel wool or abrasive scouring pads scratch glazed surfaces permanently. Those scratches then trap dirt, making the tile harder to clean going forward.
Ammonia-based cleaners on grout accelerate grout breakdown. Ammonia is fine on the tile surface but actively damages the cementitious material between tiles.
Oil-based cleaners or wax-based products leave a film on ceramic tile that attracts soil and creates a slippery surface. Once applied, this film is difficult to remove without professional stripping.
Undiluted bleach is unnecessary and creates fumes in enclosed spaces like bathrooms. Diluted bleach (1:10 ratio) is safe on glazed ceramic in a pinch but discolors colored grout.
5 Proven Methods to Clean Ceramic Tile
These five methods are arranged from lightest to most intensive. Start with Method 1 for routine maintenance and move up the scale only when the soil level demands it. Over-cleaning with aggressive methods causes more long-term damage than under-cleaning.
Method 1 - Daily Maintenance Clean (Sweep + Damp Mop)
A 10-minute sweep-and-mop routine prevents 80% of the buildup that leads to deep cleaning emergencies.
Loose dirt, sand, and grit act like sandpaper under foot traffic. Every step grinds particles into the tile surface and grout lines. Removing them daily is the single most effective thing you can do for ceramic tile longevity.
Steps:
-
Sweep or dry vacuum the entire tile surface. Use a microfiber dust mop - not a broom, which kicks fine particles into the air and back onto surfaces.
-
Damp mop with warm water and 2-3 drops of pH-neutral dish soap. Wring the mop until it's barely damp.
-
Work in sections, rinsing the mop head frequently in clean water.
-
For glazed tile, buff dry with a microfiber cloth to prevent water spots. For unglazed tile, ensure no standing water remains.
Frequency: Daily in kitchens, bathrooms, and entryways. Every 2-3 days in low-traffic rooms.
Method 2 - Weekly Deep Mop with Cleaning Solution
Once a week, step up from plain water to a proper cleaning solution that cuts through the film of body oils, cooking residue, and tracked-in contaminants that daily mopping doesn't fully remove.
Steps:
-
Dry dust the floor first. Never skip this.
-
Mix your cleaning solution: 1/4 cup pH-neutral cleaner per gallon of warm water. For DIY, use 1 part white vinegar to 10 parts water (glazed tile only).
-
Mop in an S-pattern, working from the far corner toward the exit. Avoid walking on freshly mopped areas.
-
Follow with a clean-water rinse pass. Skipping the rinse is the number one cause of streaky, dull-looking tile.
-
Dry the floor with a fan, open windows, or microfiber towels.
Pro insight: Water temperature matters more than most people realize. Warm water (100-120°F) dissolves soil and cleaning agents more effectively than cold water. Hot water above 140°F can cause thermal shock on some tiles and accelerate grout deterioration.

Method 3 - Grout Cleaning with Baking Soda and Peroxide Paste
Grout needs its own dedicated cleaning step. Mopping over grout lines doesn't generate enough mechanical agitation to pull embedded soil out of the porous surface.
Steps:
-
Mix a paste: 3 parts baking soda to 1 part hydrogen peroxide (3% standard drugstore concentration). Add 1 drop of dish soap to help the paste cling.
-
Apply the paste directly onto grout lines using a small brush or old toothbrush.
-
Let it dwell for 10-15 minutes. The peroxide needs time to oxidize stains and kill mold spores.
-
Scrub with a stiff-bristle grout brush using short, focused strokes along the grout line.
-
Wipe the paste away with a damp cloth, then mop the entire area to remove residue.
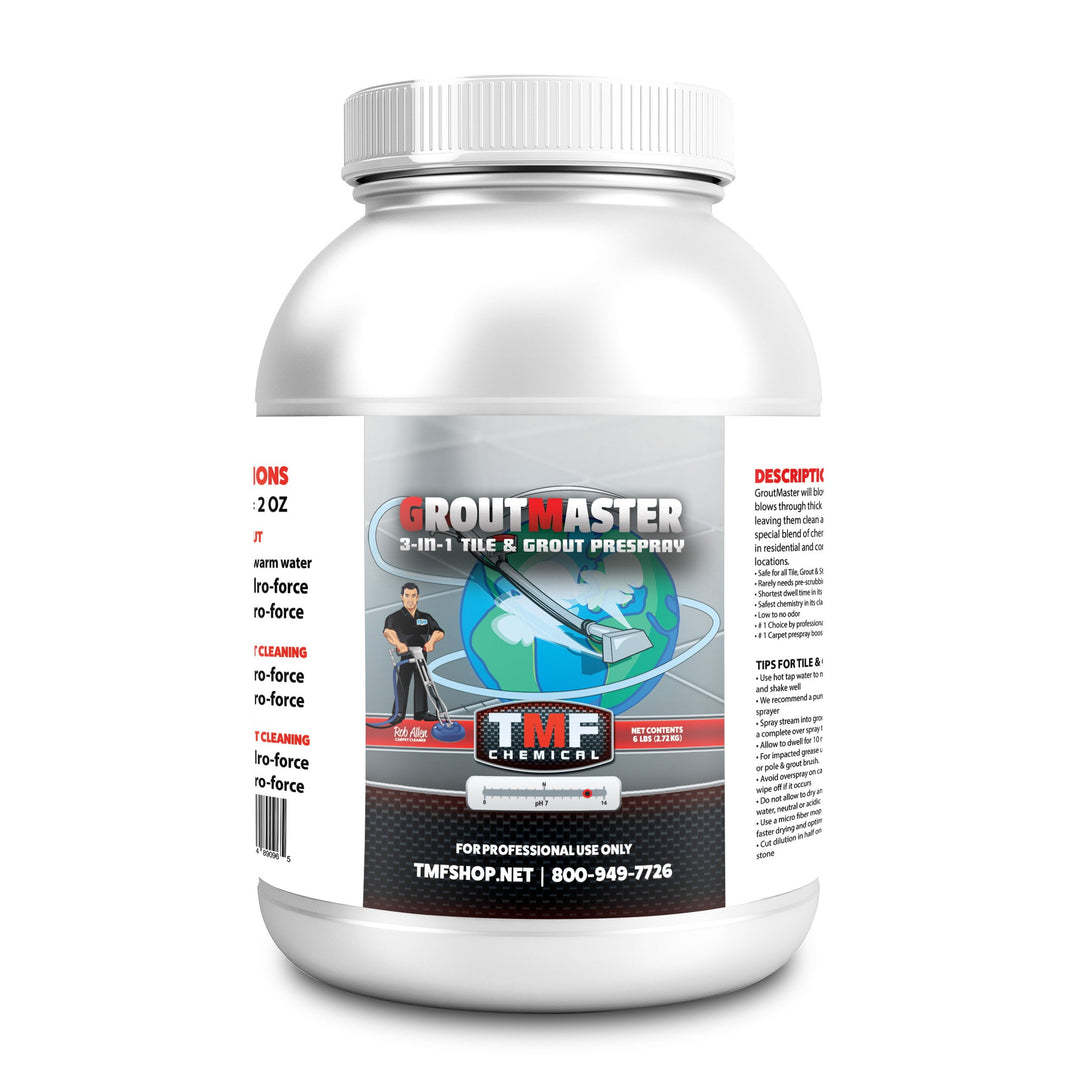
For grout that's heavily stained or hasn't been cleaned in over a year, a professional-strength product like Groutmaster outperforms DIY pastes significantly. The chemistry is designed to penetrate deeper into the grout matrix.
Frequency: Monthly in bathrooms and kitchens. Quarterly in dry, low-traffic areas.
Method 4 - Steam Cleaning for Deep Sanitization
Steam cleaning uses heat and pressure to sanitize tile and loosen embedded soil without chemicals. It works exceptionally well on glazed ceramic tile and is one of the few methods that kills bacteria and dust mites on contact.
When steam works:
-
Glazed ceramic tile with intact grout
-
Bathroom tile with soap scum and mildew
-
Kitchen tile with grease film
-
Households with allergy concerns or chemical sensitivities
When steam doesn't work (or causes damage):
-
Unglazed ceramic tile - steam forces moisture into the porous clay body
-
Cracked or deteriorating grout - steam pressure pushes water behind tiles
-
Freshly sealed grout (within 48 hours) - heat can compromise the sealant
Steps:
-
Sweep or vacuum loose debris first.
-
Use the steam cleaner on a medium setting. High-pressure settings can blast grout out of joints.
-
Work in 2x2 foot sections, holding the steam head at a consistent angle.
-
Wipe each section with a microfiber cloth immediately after steaming.
-
Allow the floor to air dry for 15-20 minutes before foot traffic.
Method 5 - Intensive Restoration Clean for Neglected Tile
This method is for ceramic tile that has heavy buildup - years of wax layers, ground-in soil in grout, yellowed or discolored surfaces, or tile in a newly purchased home where previous cleaning history is unknown.
This is the approach professional tile cleaners use, adapted here for motivated homeowners. It combines chemical action, mechanical agitation, and extraction for results that no amount of mopping can match.
Steps:
-
Pre-sweep thoroughly. Remove all loose debris and furniture from the area.
-
Apply an alkaline pre-spray to the entire tile and grout surface. Dilute according to product instructions. Let it dwell for 5-10 minutes. This breaks the bond between soil and the tile/grout surface.
-
Agitate mechanically. Use a stiff brush for grout lines and a soft-bristle brush or rotary pad for the tile surface. For larger areas, a counter-rotating brush machine dramatically speeds up this step.
-
Extract or mop up the dirty solution. A wet vacuum pulls far more soil out of grout than mopping alone. Professional tile and grout cleaning tools with built-in extraction deliver the best results.
-
Rinse with an acidic rinse (pH 3-4) to neutralize alkaline residue and restore the tile surface to a neutral pH. Skipping the rinse leaves a sticky residue that re-soils rapidly.
-
Dry completely with fans or air movers before resealing grout.
-
Reseal grout within 24-48 hours of a restoration clean. Freshly cleaned grout without sealant will re-stain faster than before.
This method requires more investment in time and products but delivers results that reset the clock on tile that looked beyond saving.
How to Clean Ceramic Tile in Every Room
The same tile in different rooms collects different types of soil, and each soil type responds to different cleaning chemistry. A one-size-fits-all approach leaves residues and misses the dominant contaminant in each space.

Kitchen Floors and Backsplash (Grease and Food Stains)
Kitchen ceramic tile is exposed to cooking oils, food splatter, and grease vapor that settles on every surface - including the backsplash above the stove.
For floors: Add a degreasing agent to your weekly cleaning solution. A few drops of dish soap with warm water handles light grease. For heavy buildup around the stove area, apply a dedicated degreaser, let it dwell for 3-5 minutes, then scrub and mop.
For backsplash: Spray the cleaning solution onto a microfiber cloth first, then wipe the tile. Spraying directly onto vertical surfaces sends solution running into grout lines and behind the tile edges where water damage starts.
Wipe backsplash tile after every cooking session that involves frying. A 30-second wipe while the stove cools prevents the baked-on grease layer that requires aggressive scrubbing later.
Bathroom Floors, Walls, and Shower Tile (Soap Scum and Mold)
Bathrooms combine moisture, soap residue, body oils, and limited ventilation - creating ideal conditions for soap scum, mildew, and mold on both tile and grout.
Soap scum removal: Use a slightly acidic cleaner (vinegar solution or a dedicated soap scum remover) on the glazed tile surface. Apply, let it sit for 5 minutes, scrub with a soft brush, and squeegee off.
Mold and mildew on grout: The baking soda and peroxide paste from Method 3 works well here. For persistent mold, increase the hydrogen peroxide concentration to full strength (3%) and extend dwell time to 20 minutes.
Prevention habit: Squeegee shower walls and glass after every use. This single habit reduces soap scum buildup by roughly 90% and cuts shower cleaning time in half. Run the bathroom exhaust fan for at least 20 minutes after showering to reduce ambient moisture.
Entryway and High-Traffic Floors (Mud, Salt, and Tracked-In Dirt)
Entryway ceramic tile takes the hardest physical beating. Sand, gravel, and road salt grind into the surface under every footstep.
Daily sweeping is non-negotiable here. A day's worth of grit in an entryway causes more surface wear than a month of normal foot traffic in a bedroom.
Winter salt residue leaves a white haze on ceramic tile that regular mopping smears rather than removes. Use a solution of 1 tablespoon white vinegar per gallon of warm water to dissolve mineral deposits. Mop, rinse, and dry.
Place walk-off mats at both the exterior and interior sides of entryway doors. According to the Carpet and Rug Institute, a good quality mat system captures up to 80% of tracked-in soil before it reaches your tile.
Outdoor Ceramic Tile (Patios and Covered Porches)
Outdoor ceramic tile faces UV exposure, rain, organic debris, and potential freeze-thaw cycles that indoor tile never encounters.
Algae and moss growth on shaded outdoor tile creates a slip hazard. Scrub with an oxygen-based cleaner and a stiff brush. Avoid pressure washing above 1,200 PSI on ceramic tile - higher pressures blast grout out of joints and can crack glazed surfaces.
Sweep outdoor tile weekly to prevent organic matter from decomposing in grout lines. Decomposing leaves create acidic conditions that accelerate grout erosion.
How to Remove Specific Stains from Ceramic Tile
Treat stains based on their chemistry, not their color. The table below matches common stains to the cleaning approach that actually breaks down the specific contaminant.
|
Stain Type |
Best Treatment |
Dwell Time |
What to Avoid |
|
Rust |
Lemon juice + salt paste, or commercial rust remover (oxalic acid based) |
10-15 min |
Bleach - it sets rust stains permanently |
|
Red wine, coffee, tea |
Hydrogen peroxide (3%) or oxygen-based cleaner |
15-20 min |
Scrubbing before applying solution - spreads the stain |
|
Grease and cooking oil |
Baking soda absorption (15 min) followed by degreaser spray |
5-10 min for degreaser |
Oil-based cleaners - they add to the problem |
|
Mold and mildew |
Peroxide paste (3:1 baking soda to H2O2) on grout; diluted bleach (1:10) on glazed tile |
15-20 min |
Mixing bleach with vinegar or ammonia - creates toxic gas |
|
Ink and marker |
Rubbing alcohol on a cotton ball, blot don't rub |
Immediate |
Acetone on colored or unglazed tile - causes discoloration |
|
Hard water deposits |
White vinegar solution (1:3 with water) |
10 min |
Abrasive scrubbing - scratches glazed surface |
Critical rule for all stains: Blot first, never rub. Rubbing spreads the stain into a larger area and pushes it deeper into grout pores.
7 Mistakes That Ruin Ceramic Tile (and How to Avoid Them)
Years of cleaning experience - both personal and from thousands of conversations at TruckMountForums - reveal the same tile-damaging mistakes repeated across households.
Using Too Much Water on Unglazed Tile
Unglazed ceramic absorbs water directly into the clay body. Excessive moisture causes efflorescence (white mineral deposits that push to the surface), loosens adhesive bonds, and creates conditions for mold growth underneath the tile.
Fix: Use a barely-damp mop. Wring it until no water drips. Dry the surface immediately after cleaning.
Scrubbing with Abrasive Tools
Steel wool, metal scrapers, and stiff wire brushes scratch glazed ceramic permanently. Those scratches create micro-grooves that trap dirt and make the tile progressively harder to clean.
Fix: Use soft-bristle brushes on tile surfaces. Reserve stiff nylon brushes for grout only.
Skipping the Dry Dust Removal Step
Mopping over loose grit is the equivalent of rubbing sandpaper across your tile. Every cleaning session should start with sweeping or dry vacuuming - no exceptions.
Fix: Keep a microfiber dust mop accessible near your most-used tile areas. A 2-minute dry sweep before damp mopping prevents cumulative surface damage.
Using the Wrong pH Cleaner
Acidic cleaners (vinegar, citrus-based) dissolve cement-based grout over time. Alkaline cleaners left without rinsing leave a sticky film that attracts dirt faster.
Fix: Use pH-neutral cleaners for routine cleaning. Reserve acidic or alkaline products for targeted tasks, and always rinse thoroughly after use.
Additional mistakes to avoid:
-
Letting dirty mop water sit on the floor while you take a break - it deposits a film of suspended soil as it dries
-
Ignoring grout sealing after deep cleaning - clean, unsealed grout re-stains faster than dirty sealed grout
-
Using wax-based "shine" products - they build up layer after layer, yellow over time, and require professional stripping to remove

How to Keep Ceramic Tile Clean Longer (Maintenance Schedule)
Consistent light cleaning prevents heavy cleaning. The schedule below keeps ceramic tile in excellent condition with minimal weekly effort.
Daily, Weekly, and Monthly Cleaning Cadence
|
Frequency |
Task |
Time |
|
Daily |
Sweep or dust mop all ceramic tile floors |
5-10 min |
|
Daily |
Squeegee shower walls after use |
1 min |
|
Weekly |
Deep mop with cleaning solution + rinse pass (Method 2) |
20-30 min |
|
Monthly |
Grout cleaning with peroxide paste (Method 3) in bathrooms and kitchen |
30-45 min |
|
Quarterly |
Deep clean low-traffic tile areas; inspect grout condition |
1-2 hours |
|
Annually |
Full restoration clean (Method 5) if needed; reseal all grout |
Half day |
When to Reseal Grout (and How to Tell It's Time)
Grout sealant wears off over time, especially in wet areas and high-traffic zones. The water bead test tells you exactly when resealing is needed.
Drop a few beads of water onto a grout line. If the water sits on top and beads, the sealant is intact. If the water absorbs into the grout within 1-2 minutes, it's time to reseal.
Most residential grout needs resealing every 1-2 years. Shower grout may need it annually. Resealing takes about 30 minutes per average-sized room and costs under $25 in materials.
When to Call a Professional Tile Cleaner
DIY methods handle 90% of ceramic tile cleaning situations. The remaining 10% genuinely benefits from professional equipment and chemistry.
Call a pro when:
-
Grout is discolored beyond what peroxide paste can restore
-
Wax or coating buildup requires chemical stripping
-
The tile area exceeds 500 square feet and manual scrubbing isn't practical
-
Mold has penetrated beneath the tile into the substrate
-
You need the tile cleaned for a health-sensitive environment (newborn, immunocompromised family member)
Professional tile cleaners use truck-mounted extraction systems, spinner tools, and commercial-grade tile cleaning equipment that generate heat, pressure, and vacuum simultaneously. The difference in results between a mop and a professional hard surface extraction tool is significant.
If you're a cleaning professional looking to add tile and grout services, the TMF Stone, Tile & Grout Cleaning Course covers chemistry, equipment selection, and pricing strategies.
Ceramic Tile Cleaning Products Worth Trying
Best pH-Neutral Tile Cleaners
For daily and weekly cleaning, pH-neutral formulas protect both glazed ceramic and grout. Look for products in the pH 6-8 range with no added dyes or fragrances. A small amount goes a long way - over-diluting is better than over-concentrating.
Best Grout Cleaners and Brushes
Oxygen-based powdered cleaners (sodium percarbonate) deliver consistent results on grout without the fumes or grout damage caused by bleach. Pair them with a narrow, stiff-bristle grout brush designed to reach into the joint without scraping the tile edges.
For heavy commercial or residential grout restoration, Groutmaster is formulated to penetrate deeply into cementitious grout, break bonds with embedded soil, and rinse clean without residue. It's the same product professionals use on restaurant tile and commercial restrooms.
Steam Cleaners and Extraction Tools for Tile
Consumer-grade steam mops work for light sanitization on glazed ceramic. For deeper results - especially on textured tile or large grout joints - professional extraction tools that combine solution pressure, agitation, and vacuum recovery in one pass outperform any manual method.
The ceramic tile and grout cleaning guide on the TMF blog covers product selection in more detail.
Frequently Asked Questions
What is the best thing to clean ceramic tile with? A pH-neutral cleaner diluted in warm water handles daily cleaning. For deeper soil, oxygen-based cleaners or hydrogen peroxide work without damaging the tile or grout. Match the product strength to the soil level - stronger is not always better.
Can you use vinegar on ceramic tile? Vinegar is safe on glazed ceramic tile surfaces when diluted (1:10 ratio with water). Avoid using it directly on grout. The acidity weakens cement-based grout over time, leading to crumbling and discoloration.
How do you clean ceramic tile floors without streaks? Use less cleaning solution than you think you need, rinse the mop head frequently in clean water, and follow up with a clean-water rinse pass. Buff dry with a microfiber cloth. Streaks come from detergent residue, not from the water itself.
How do you make ceramic tile look new again? Deep clean the grout with a peroxide-based paste, mop the tile with an appropriate cleaning solution, rinse thoroughly, and reseal the grout. For badly neglected tile, Method 5 (restoration clean) resets the surface to near-original condition.
Is it safe to use bleach on ceramic tile? Diluted bleach (1:10 with water) is safe on glazed ceramic but damages colored grout and produces harmful fumes in poorly ventilated spaces. Hydrogen peroxide delivers comparable disinfection without the drawbacks.
How often should you deep clean ceramic tile? Monthly in kitchens and bathrooms where moisture, grease, and soap scum accumulate. Quarterly for hallways and low-traffic rooms. Annually for a full restoration-level clean with grout resealing.
What should you never use on ceramic tile? Steel wool, ammonia-based cleaners on grout, wax-based polishes, undiluted bleach, and oil-based cleaning products. Each one causes specific, often irreversible damage to tile surfaces or grout.
How do you clean textured ceramic tile that traps dirt? Use a soft-bristle brush with cleaning solution and scrub in circular motions to reach into the textured surface grooves. Flat mops glide over the raised pattern and miss the recessed areas entirely. Rinse with clean water and dry thoroughly.
Conclusion
Ceramic tile is durable, but it's not maintenance-free. The five methods outlined here give you a clear framework: start with daily sweeping and damp mopping, step up to weekly solution mopping, treat grout monthly, and reserve steam or restoration methods for quarterly or annual deep cleans.
Protect the grout, use the right pH for each task, and skip the abrasive shortcuts that cause long-term damage. Your tile will look better, last longer, and require less effort to maintain - starting with your next clean.
References
-
Tile Council of North America (TCNA) - Ceramic Tile Care & Maintenance Guidelines - 2024 - https://www.tcnatile.com
-
Carpet and Rug Institute - Walk-Off Mat Effectiveness Studies - 2023 - https://www.carpet-rug.org
-
U.S. Environmental Protection Agency (EPA) - Safer Choice Cleaning Product Standards - 2024 - https://www.epa.gov/saferchoice