How to Get Rid of Mouse Urine Smell: 7 Pro Steps
Key Takeaways
-
Mouse urine odor is caused by ammonia released as bacteria break down urea - masking sprays don't eliminate it, only enzyme cleaners do.
-
Never sweep or vacuum dry mouse droppings; this can aerosolize hantavirus particles. Always disinfect first.
-
A UV black light reveals hidden urine deposits invisible to the naked eye - skipping this step is the #1 reason smell keeps returning after cleaning.
-
Wood is one of the most challenging surfaces to treat because urine can penetrate beyond the finish and into the wood fibers or subfloor, often requiring deeper cleaning, sealing, or refinishing to fully eliminate odors.
-
Enzyme cleaners must saturate the material to the full depth the urine reached; surface-only application leaves odor locked in porous material below.
-
If smell persists after two full enzyme treatments, replace the carpet pad or seal the subfloor with an oil-based odor-blocking primer before re-laying flooring.
To get rid of mouse urine smell, you need to disinfect first, then apply an enzyme cleaner that breaks down uric acid at the molecular level - not mask it with sprays or wipe it with bleach alone. The process works on carpet, wood, walls, and cars, but only if you follow the right sequence.
Most cleaning attempts fail because people skip the UV detection step, apply enzyme cleaner too lightly, or reach for bleach and ammonia-based products that either miss the odor source or make the problem worse. This guide covers all 7 steps professionals use - from gearing up safely to sealing surfaces so the smell never comes back.
What Makes Mouse Urine Smell So Persistent?
Mouse urine smells so persistent because urea - its primary compound - breaks down into ammonia over time as bacteria decompose it, and the resulting uric acid crystals bind tightly to porous surfaces like wood, carpet fibers, and drywall.
That acrid, sharp odor is not ammonia alone. It's a combination of ammonia gas and uric acid crystals embedded in whatever surface the urine contacted. The older the contamination, the more the crystals have settled deep into material pores - and the worse the smell gets, especially in humid conditions when those crystals reactivate and release fresh odor.

The Chemistry Behind the Odor
Fresh mouse urine contains urea, creatinine, and proteins. As bacteria decompose the urea, ammonia is released - that's the sharp, eye-watering smell you notice immediately. What stays behind long-term are uric acid crystals, which bond to porous surfaces at a molecular level.
These crystals don't dissolve in water. They don't respond to bleach. They reactivate with humidity and heat, which is why a room that seemed fine in winter can suddenly smell like mice again in summer. Breaking down uric acid requires enzymes - specifically protease and urease - which digest the crystalline structures directly.
Why Regular Cleaners Don't Work
Bleach disinfects surfaces effectively and kills pathogens, but it does not neutralize uric acid crystals. You can sanitize an area with bleach and still have a strong odor problem hours later.
Ammonia-based cleaners are even more problematic. Mouse urine contains ammonia, and using an ammonia-based product on contaminated areas leaves behind a scent chemically similar to rodent urine - which can actively attract new mice to the same spots. This is one of the most common reasons a rodent problem returns after cleaning.
Air fresheners and scent sprays mask top-layer odor compounds briefly, but do nothing for the uric acid embedded in surfaces below.
Health Risks You Need to Know Before Starting
According to the CDC, mice and rats can spread more than 35 diseases to humans through urine, droppings, and saliva - including hantavirus pulmonary syndrome and leptospirosis. Hantavirus is particularly dangerous because it can become airborne when dry droppings or urine residue are disturbed.
This means dry-sweeping or vacuuming a contaminated area before disinfecting can push infectious particles into the air you're breathing. Protective equipment and the correct cleaning sequence are not optional - they're the difference between safe cleanup and serious health risk.
Step 1 - Gear Up Before You Touch Anything
Before touching any contaminated surface, put on rubber or nitrile gloves, an N95 respirator, and safety glasses - this is the CDC-recommended minimum for rodent urine cleanup in a residential setting.
Skipping PPE is the most common mistake homeowners make when dealing with mouse contamination. The risks are not limited to odor. Urine residue, dried droppings, and nesting materials can all carry pathogens that are dangerous when touched or inhaled.
Protective Equipment Checklist
Gather the following before starting:
-
Rubber or nitrile gloves - latex is acceptable but nitrile provides better chemical resistance
-
N95 respirator - a standard dust mask does not filter the fine particles that carry hantavirus; an N95 is the minimum
-
Safety glasses - protects against splashing disinfectant and airborne particles
-
Disposable coveralls - recommended for heavy infestations or enclosed spaces like attics and crawl spaces
-
Disposable shoe covers - prevents tracking contamination to other areas of the home
Wear all of this before entering a contaminated room. Remove and dispose of gloves and any disposable items inside a sealed plastic bag immediately after cleanup.
Ventilate the Area First
Open all windows and doors in the affected area for at least 30 minutes before you begin cleaning. This is a CDC-specified step that reduces airborne concentration of hantavirus particles.
Use cross-ventilation - open windows on opposite sides of the room to move fresh air through. Leave the area during this airing-out period rather than staying in it while waiting.
One critical note: if you suspect mice have nested in or near your HVAC system, do not run the heating or air conditioning during cleanup. Running the system can pull contaminated air through ducts and distribute it to the rest of the home.

Step 2 - Find Every Contaminated Spot With a UV Light
A UV black light is the most effective tool for locating all mouse urine deposits before cleaning - urine fluoresces under UV wavelengths, revealing contamination invisible to the naked eye.
This is the step most homeowners skip entirely, and it's the primary reason the smell comes back after cleaning. You can clean every visible stain perfectly and still miss 40-60% of the contaminated area if you're relying on sight alone. Mouse urine trails are often deposited along walls, behind appliances, and inside cabinets in small, scattered amounts - none of which show up in normal light.
How to Use a UV Black Light for Urine Detection
Follow this sequence for accurate results:
-
Wait until the room is dark, or block windows with curtains. UV detection only works in low-light conditions.
-
Hold the UV light 6-12 inches from the surface and move slowly.
-
Mouse urine glows bright green or yellow. Mark every spot with painter's tape or chalk before you begin cleaning - once the lights go back on, you lose your reference points.
-
Check all surfaces: floors, baseboards, lower sections of walls, the underside of furniture, and inside cabinets and drawers.
The TMF Bad Boy UV Detection Light covers large areas quickly and provides the high-intensity UV output needed to detect older, dried deposits that lower-powered lights miss.
Common Hidden Hot Spots in Homes
Mice follow wall edges and travel the same routes repeatedly, depositing urine as territorial markers. Concentrate your UV scan on:
-
Behind and underneath refrigerators, stoves, and dishwashers
-
Inside kitchen and bathroom cabinet base corners
-
Along wall-floor junctions and behind baseboards
-
Inside attic insulation and crawl spaces
-
Air duct openings and return vents (check for nesting materials)
-
Inside storage boxes and behind furniture pushed against walls
Mark every glowing spot before moving to Step 3. A spot you miss now is an odor source that survives every cleaning pass.
Step 3 - Disinfect Before You Deodorize
Disinfect all contaminated surfaces before applying any odor-removal product - killing pathogens first is not only a safety step - it also removes organic material that would otherwise interfere with enzyme cleaner performance.
The sequence matters. Applying enzyme cleaner to an area still loaded with active bacteria and organic debris reduces its effectiveness. Disinfection clears the biological load so the enzyme treatment can focus entirely on the uric acid crystals causing the odor.
Hard Surfaces - Floors, Countertops, Walls
The CDC recommends a bleach solution of 1 part bleach to 10 parts water for rodent urine cleanup. Apply it directly to all hard surfaces where urine was present:
-
Spray the bleach solution generously on the marked area.
-
Allow it to soak for a minimum of 5 minutes.
-
Wipe up with paper towels - do not use a cloth you plan to reuse.
-
Seal used paper towels in a plastic bag and dispose of them immediately.
-
Mop the area with disinfectant solution as a second pass on floors.
For EPA-registered commercial disinfectants, follow the product label for dilution ratio and contact time. Browse TMF's disinfectants and sanitizers collection for professional-grade options that meet EPA efficacy standards.

Soft Materials - Nesting Materials and Debris
Never pick up dry nesting materials with bare hands or sweep them. Spray disinfectant solution directly onto the nest material and surrounding area first, then wait 5 minutes before handling.
Use gloved hands to place all contaminated material - nesting debris, droppings, used paper towels - into a plastic bag. Seal it, place that bag inside a second plastic bag, and seal again before disposal in an outdoor bin.
Wash any clothing or bedding with confirmed rodent contact in hot water with standard laundry detergent. Hot water is key - cold water does not effectively deactivate rodent-associated pathogens.
Step 4 - Apply Enzyme Cleaner for Odor Neutralization
Enzyme cleaners are the only product category that neutralizes mouse urine odor at the source - they work by deploying protease and urease enzymes that digest uric acid crystals and odor-causing proteins, rather than masking or disinfecting over them.
This is the core step. Everything before it clears the path; this is what eliminates the smell. The critical variable most people get wrong is application depth. If the urine soaked 2 inches into carpet backing and you apply enzyme cleaner to the surface fibers, the uric acid crystals at the base remain untouched. The area may smell fine when wet, then the odor returns completely once it dries.
How Enzyme Cleaners Work
Protease enzymes break down the protein chains in urine. Urease enzymes target uric acid specifically, converting it into compounds that evaporate rather than remain embedded in surfaces. Together, they digest the organic molecules causing the odor at a molecular level - a chemical process bleach, vinegar, and baking soda cannot replicate.
The enzyme reaction requires dwell time. Applying cleaner and immediately wiping it up stops the enzymatic process before it completes. Most products need 10-30 minutes of contact time, and some formulations designed for deep contamination benefit from several hours.
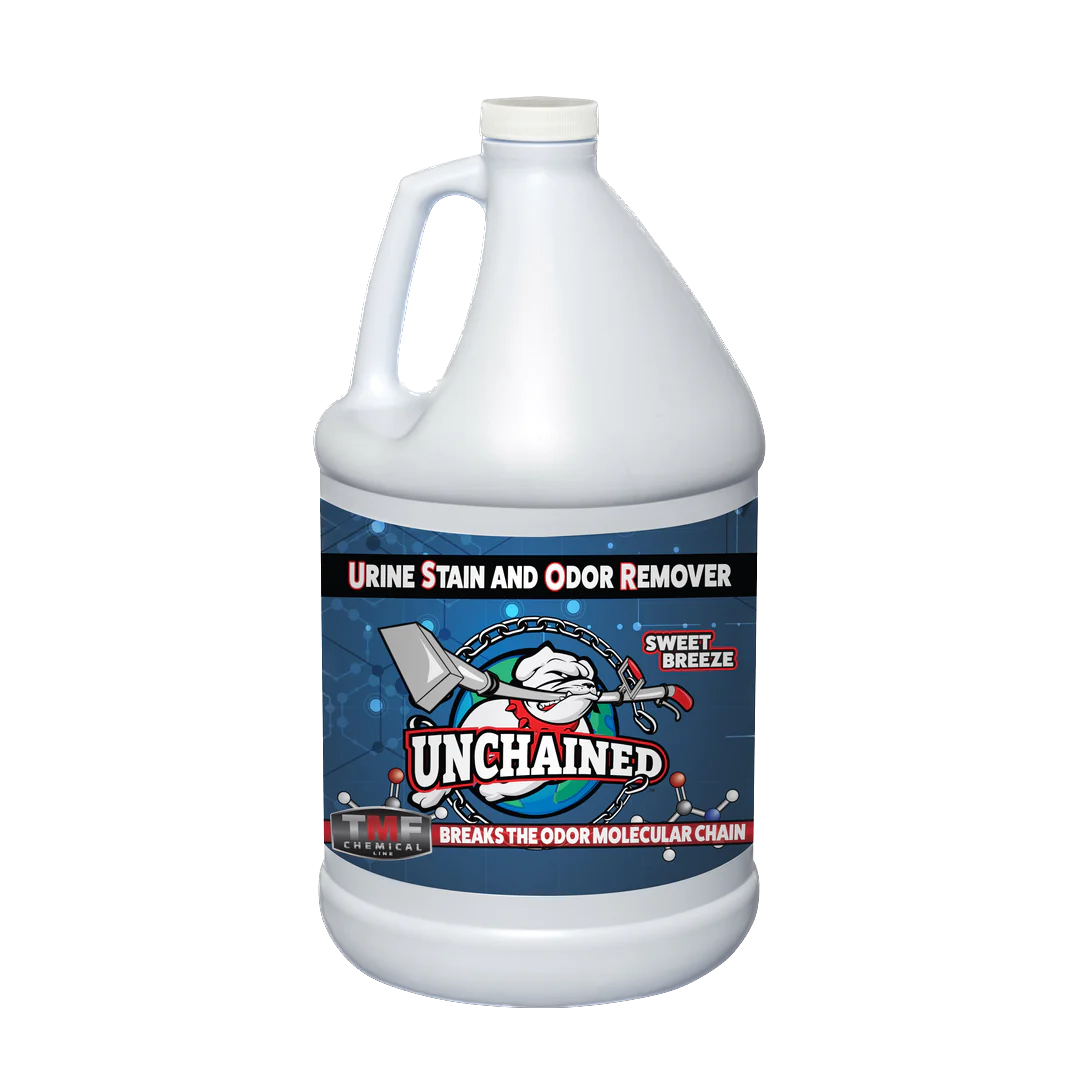
Products like USOR Unchained combine enzyme action with Ecocide technology, making them effective on both the biological contamination and the odor compounds simultaneously. For heavy enzyme-based prespray applications, BioPro 10K delivers high-concentration protease enzyme activity suited to severe rodent urine contamination.
Application Protocol Step by Step
-
Pre-test for colorfastness on carpet or upholstery - apply a small amount to a hidden area and wait 5 minutes before proceeding.
-
Saturate fully - apply enough enzyme cleaner that it penetrates to the depth the urine reached. For carpet, this means soaking through to the backing and pad below.
-
Allow the full dwell time listed on the product label. Cover with plastic sheeting if needed to slow evaporation on porous surfaces.
-
Work the product in with a soft brush on wood or upholstery; a carpet brush or CRB machine on carpet for larger areas.
-
Extract with a wet-dry vacuum or carpet extractor using clean water. Do not over-rinse - residual detergent in the fibers traps odor compounds.
-
Allow to dry completely - check with your nose and, if needed, re-scan with UV light once dry. Repeat the enzyme application if any odor remains.
What to Avoid When Using Enzyme Cleaners
-
Do not mix enzyme cleaners with bleach - bleach denatures the protein-based enzymes and deactivates the product entirely.
-
Do not apply hydrogen peroxide before enzyme cleaner - strong oxidizers break down the enzyme chains. Use hydrogen peroxide as a follow-up only after the enzymatic treatment is complete and the area is dry.
-
Do not use ammonia-based cleaners at any point - this attracts rodents back to the treated area through scent signaling.
Step 5 - Surface-Specific Treatments
The finishing protocol after enzyme treatment varies by surface - carpet may require pad replacement, wood requires careful moisture control, and walls with heavy contamination may need drywall removal rather than cleaning.
Enzyme cleaner handles the chemistry. What you do next depends on what the urine soaked into and how deep the contamination went. Here is the surface-by-surface breakdown.
Carpet and Rugs
After enzyme treatment, gently lift a corner of the carpet and inspect the pad below. If the pad is discolored, wet, or still smells after the carpet has dried, it needs to be cut out and replaced. Urine that saturates a carpet pad cannot be fully removed through surface cleaning - the pad holds odor indefinitely.
Before re-laying new carpet padding, treat the subfloor with enzyme cleaner and allow it to dry completely. If any odor remains in the subfloor wood, seal it with an oil-based odor-blocking primer (such as Kilz Original) before installing new pad. This traps any residual molecules below the surface permanently.
For widespread carpet contamination, professional steam extraction delivers better results than DIY methods. Hot water extraction combined with an enzyme rinse removes more contaminated material from deep in the fiber and backing than a wet-dry vacuum can achieve. Browse TMF's carpet cleaning chemicals for enzyme-based extraction solutions.
Hardwood and Subfloors
Apply enzyme cleaner with a soft cloth or sponge - do not over-saturate wood grain, as excess moisture causes warping and discoloration. As described in TMF's guide on how to get mouse urine smell out of wood, the enzyme solution needs time to penetrate the wood pores and break down the embedded odor molecules. Allow 10-15 minutes of dwell time, then rinse lightly with a clean damp cloth and dry the surface thoroughly.

For severe cases where urine has penetrated the wood and the finish is compromised, lightly sand the affected area to open the wood surface before applying enzyme cleaner. Sanding is not necessary for surface-level contamination that has not penetrated beyond the finish. Follow with two coats of oil-based odor-blocking primer once the area is odor-free and dry, then refinish as needed. Do not use water-based or latex primers for this purpose - they do not seal odor compounds effectively.
Browse TMF's wood floor cleaning collection for products formulated specifically for wooden surfaces.
Walls, Drywall, and Insulation
Hard wall surfaces (painted drywall, tile, concrete) respond well to enzyme spray with a full dwell time. Apply liberally, allow 15-20 minutes, then wipe and allow the surface to dry.
Heavily contaminated drywall and insulation are a different problem. Drywall is paper-faced gypsum - both materials are highly porous and absorb urine deeply. If the contamination is significant, no enzyme treatment will fully remove the embedded odor. The affected sections need to be cut out and replaced. Use a moisture meter to check drywall panels adjacent to visible contamination - they may be affected even without visible staining.
Inside a Car
Remove floor mats, seat covers, and any stored items from the vehicle first. Check the cabin air filter - mice frequently nest in air box assemblies, and a contaminated filter will push odor through the entire HVAC system every time you run the climate control.
Apply enzyme cleaner to all upholstered surfaces - seats, door panels, carpet - with adequate dwell time, then extract with a wet-dry vacuum. Replace the cabin air filter regardless of visible contamination. Place activated charcoal bags under the seats after cleaning to absorb any residual odor compounds over the following days.
Step 6 - Neutralize Residual Odor
After enzyme treatment is complete, supporting odor neutralizers help eliminate any remaining airborne volatile compounds - but these are finishing steps, not substitutes for the enzyme cleaning protocol.
Think of this step as clearing the last 5-10% of odor that enzyme cleaners addressed at the surface but didn't fully clear from the air in enclosed spaces.
Baking Soda and Activated Charcoal
Baking soda absorbs volatile odor compounds from the air and surface. After the treated area is dry, sprinkle baking soda generously across carpet and upholstery, leave it overnight, then vacuum thoroughly. For hard floors and walls, place open bowls of baking soda in the room and replace every 48 hours until the smell is gone.
Activated charcoal bags outperform baking soda for enclosed spaces - inside cabinets, under sinks, inside car interiors. They absorb a broader range of volatile organic compounds and last 2-4 weeks per placement before needing replacement or recharging in sunlight.
Ozone Generators for Severe Cases
For heavy contamination in entire rooms or enclosed spaces like attics, an ozone generator is the professional-grade finishing tool. Ozone (O3) oxidizes odor-causing molecules at a molecular level, breaking the chemical bonds that create the smell rather than absorbing or masking them.
The process requires full evacuation - all people, pets, and plants must leave the treated space for the duration of the treatment, typically 2-4 hours depending on room size and contamination level. Re-enter only after the space has been ventilated with fresh air for at least 30 minutes post-treatment. The Oasis Plus Ozone Generator is a professional-grade option suited to both residential and commercial odor remediation jobs.

Step 7 - Prevent the Smell From Coming Back
Preventing mouse urine smell from returning requires both eliminating the active infestation and removing the pheromone-based scent trails mice use to navigate - an incomplete enzyme treatment that misses spots leaves active chemical signals that draw new rodents back to the same areas.
Cleaning the odor and ending the infestation are two separate problems, and both need to be solved. Address only one and the other returns.
Seal All Entry Points
According to the CDC, mice can squeeze through gaps as small as 1/4 inch (6mm) - roughly the diameter of a pencil. Common entry points include:
-
Gaps around pipe penetrations through walls and floors
-
Cracks in foundation walls and gaps at the base of exterior doors
-
Openings around utility lines and cables where they enter the building
-
Damaged weather stripping on doors and windows
Use steel wool packed into gaps followed by caulk or expanding foam to seal small openings. Hardware cloth (1/4 inch mesh) works for larger gaps around vents and pipe runs. Seal all identified entry points before considering the infestation resolved.
Eliminate Scent Trails
Mice deposit urine continuously as they travel, using it as a territorial marker and navigation aid. These pheromone-based trails communicate to other mice that a route is safe and the area is claimed. A thorough enzyme treatment that covers every UV-detected spot eliminates these trails at the chemical level.
This is why the UV detection step in Step 2 is inseparable from the cleaning process. A missed spot - even a small one - leaves an active scent signal. Other mice, including new individuals entering from outside, follow that signal directly back to the same location.
Ongoing Prevention
-
Store all food in sealed, hard-sided containers. Cardboard and plastic bags are not mouse-proof.
-
Declutter storage areas in basements, attics, and garages - nesting material is the second thing mice look for after food.
-
The CDC recommends traditional snap traps for controlling rodent populations inside homes. Poison bait stations should only be used for persistent infestations and kept out of reach of children and pets.
-
Inspect the perimeter of your home seasonally - mice become more aggressive about finding entry points as temperatures drop in fall.
When DIY Isn't Enough - Signs You Need Professional Help
Professional odor remediation is warranted when smell persists after two full enzyme treatment cycles, when contamination is confirmed inside walls or HVAC systems, or when the affected area covers more than one room.
In practice, these thresholds are reached more often than people expect - particularly in homes where a mouse infestation was undetected for an extended period. The longer urine deposits go untreated, the deeper they penetrate and the more surface area they cover.
Signs That Indicate Professional Remediation
-
Odor returns within 24-48 hours of drying after a complete enzyme treatment
-
UV light reveals contamination extending into wall cavities or subfloor areas inaccessible without removal
-
HVAC system blows out mouse odor when running
-
Visible urine staining or moisture damage on drywall or insulation
-
Large-scale contamination covering an entire room or multiple rooms
What Professional Remediation Includes
Certified remediation companies use biohazard-grade protocols including thermal fogging (which penetrates into wall cavities), commercial enzyme application systems, subfloor replacement where necessary, and HEPA air scrubbing to clear airborne particles.
Look for companies with IICRC (Institute of Inspection, Cleaning and Restoration Certification) credentials and specific experience in biohazard or rodent remediation. If you're a cleaning professional looking to expand into odor remediation services, TMF Academy training courses cover advanced odor removal protocols including urine treatment at a professional level.
Frequently Asked Questions
Does mouse urine smell go away on its own? No. Mouse urine odor does not dissipate on its own because uric acid crystals remain embedded in surfaces indefinitely. Humidity causes them to reactivate and release fresh odor. Without enzyme treatment that chemically breaks down these crystals, the smell persists and often intensifies over time.
What kills mouse urine smell immediately? No product eliminates mouse urine smell immediately - enzyme cleaners are the most effective solution, but they require 10-30 minutes of dwell time to complete the chemical reaction. Products that claim to work instantly are typically masking agents that suppress the odor briefly without addressing the uric acid at the source.
How long does mouse urine smell last? Untreated mouse urine smell can persist indefinitely. Uric acid crystals stabilize within porous materials and reactivate with heat and humidity for months or years after the original contamination. With correct enzyme treatment, the smell should be eliminated within 1-3 applications depending on contamination depth.
Is the smell of mouse urine harmful? Yes. Beyond the unpleasant odor, mouse urine can carry hantavirus, leptospirosis, and other pathogens that are dangerous to humans. The CDC advises treating any mouse contamination as a potential biohazard and using full protective equipment during cleanup.
Can I use bleach to get rid of mouse urine smell? Bleach is effective for disinfection and killing pathogens, but it does not neutralize uric acid crystals and will not eliminate the odor. Use bleach solution (1:10 with water) as a disinfection step before applying enzyme cleaner - not as a replacement for it.
How do I get rid of mouse urine smell in walls? Hard wall surfaces respond to enzyme spray with a 15-20 minute dwell time followed by wiping and drying. Drywall and insulation with significant contamination often cannot be fully cleaned and need to be cut out and replaced - the porous materials hold uric acid too deeply for enzyme products to reach.
Why does the mouse urine smell keep coming back after cleaning? The most common causes are missed contamination spots (which UV detection prevents), surface-only enzyme application that didn't reach the depth of the urine, or a continuing mouse infestation that is re-depositing urine. Run a UV scan after cleaning to confirm all spots are treated, and verify the infestation has been fully eliminated.
What does mouse urine smell like? Mouse urine has a sharp, acrid, ammonia-forward odor that intensifies in warm or humid conditions. In enclosed spaces like attics, cabinets, and car interiors, it becomes concentrated and unmistakable. Old deposits develop a more musty, sour note layered under the ammonia smell.
Conclusion
Mouse urine smell is a solvable problem - but only with the right sequence. Gear up, map the contamination with UV light, disinfect, then saturate with enzyme cleaner to the depth the urine reached. Skip any of these steps and the smell comes back. Seal your entry points and eliminate scent trails, and it stays gone. For professional-grade enzyme cleaners, UV detection tools, and deodorization equipment used by cleaning professionals, TruckMountForums carries everything you need in one place.
References
-
CDC - How to Clean Up After Rodents - 2024 - https://cdc.gov/healthy-pets/rodent-control/clean-up.html
-
CDC - Hantavirus Prevention - 2025 - https://www.cdc.gov/hantavirus/prevention/index.html
-
CDC - Controlling Wild Rodent Infestations - 2025 - https://www.cdc.gov/healthy-pets/rodent-control/
-
EPA - Rodents and Schools (disease risk reference) - 2026 - https://www.epa.gov/ipm/rodents-and-schools
-
Utah State University Extension - Ask an Expert: Mouse Cleanup Tips - 2016 - https://extension.usu.edu/news_sections/home_family_and_food/mouse-clean-up